EVS Client
Introduction
This application has been developed with the purpose of aggregating in a same user interface, the access to all validation services developed for IHE and its national extensions. Called services are the followings (non-exhaustive):
- Gazelle HL7 Validator for HL7v2.x and HL7v3 messages
- Schematron-based Validator (CDA, Audit messages, HL7v3, assertions…)
- Model-based validator for CDA
- Model-based validator for XD* messages
- Model-based validator for XDW
- Model-based validator for DSUB
- Model-based validator for SVS
- Model-based validator for HPD
- X-Validation
In the menu bar of the user interface, we have chosen to sort the validators by affinity domains; currently several affinity domains are available in the instance deployed at https://gazelle.ihe.net/EVSClient: IHE, IHE Germany, epSOS, CI-SIS France, e-sens, Sequoia and so on.
The External Validation Service Client application can be used for validating the following types of messages or documents:
- HL7 CDA files
- HL7v2.x and HL7v3 messages
- HPD messages
- SVS messages
- DSUB metadata
- SAML assertions
- Audit messages
- XD* messages (metadata)
- XDW documents
Important notice
Note that when using the EVS Client application, if you are NOT logged in, every document/message you validate is stored in our database, referenced and available to everybody. If you do not want to have your documents/messages public, then you need to log in using the “CAS login”, it uses your Gazelle’s (EU-CAT) credentials.
Note about the privacy of validation results
If the user is not logged on the application, his/her validation requests and results (that means the document/message submitted to the tool and the validation outcome) are available to everybody. We say that the result is “public”; it will be listed in the list of validation requests and everybody will be able to access and download both the validated file, and the validation report.
If the user is logged on the application, by default, his/her validation requests and results will be set as “private”. That means that he/she will be the only one to see the validation requests in the list and to access it. A permanent link is created for each validation request, the ones leading to a private request have restricted permissions; only the owner of the validation requests (the one who performed the validation) will be able to access this page. If the preference value show_logs_from_colleagues is set to true then the user will share automatically all his/her validations log with the users belonging to the same organization.
A logged on user can choose to have a given validation request available to everybody. In this case, everybody will be able to list the request and to access both the validated file, and the validation report. To do so, once the validation is performed (or at any moment from the result page), click on the “Make this result public” button. At any time, the owner of the request (and only him/her) will be able to change back the visibility of the result to private.
A logged on user can choose to keep his/her validation request (file + result) private but to allow certain users to access it also. In this case, clicking on the “share this result” button will generate a random key which, added to the URL will ensure that only the persons who know the permanent link (including the key) will be able to access the content of the validation request. The owner of the validation request will still be the only one to see the result in the list gathering all results but everyone knowing the link will be allowed to display the page. In case the preference value show_logs_from_colleagues is set to true, the log are still visible by users belonging to the same organization.
Note that the admin and monitor users are able to access all the validation requests. It’s obvious that they were use them only for verification purposes and will nor publish neither use them for other purposes.
Validation of XML files/documents
By XML file we mean all messages or documents based on XML (CDA, HL7v3 messages, XD* metadata …) All those kinds of files can be validating using a schematron and/or a model-based validator. Once you have selected (in the top bar menu) the kind of XML object you want to validate, you will reach a page which ask you to upload the XML file to validate (be careful, the application allows only files with .xml extension) and to select the schematron and/or model-based validators to use.
Below is an example of the different steps for validating a CDA CR-BIO report.
-
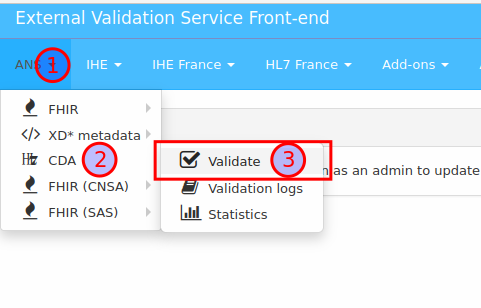
Select the menu CDA Validation in the IHE drop-down menu
-
Hit the “Add” button and select the XML file to validate in your system explorer
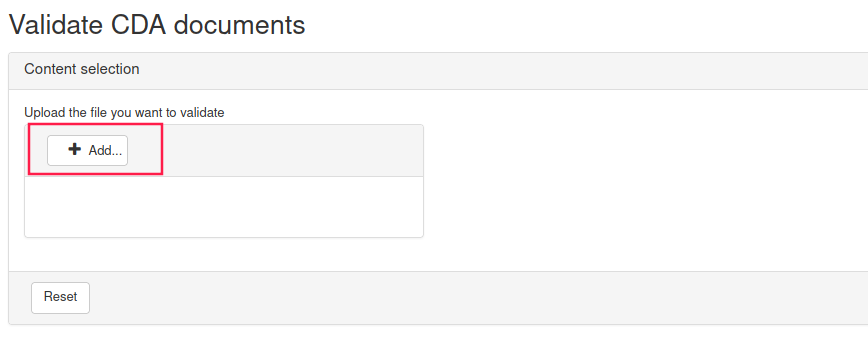

By hitting the “Reset” button, upload will be canceled, so that you can upload another file.
After uploading, message content can be previewed by clicking “Show Content” check box.
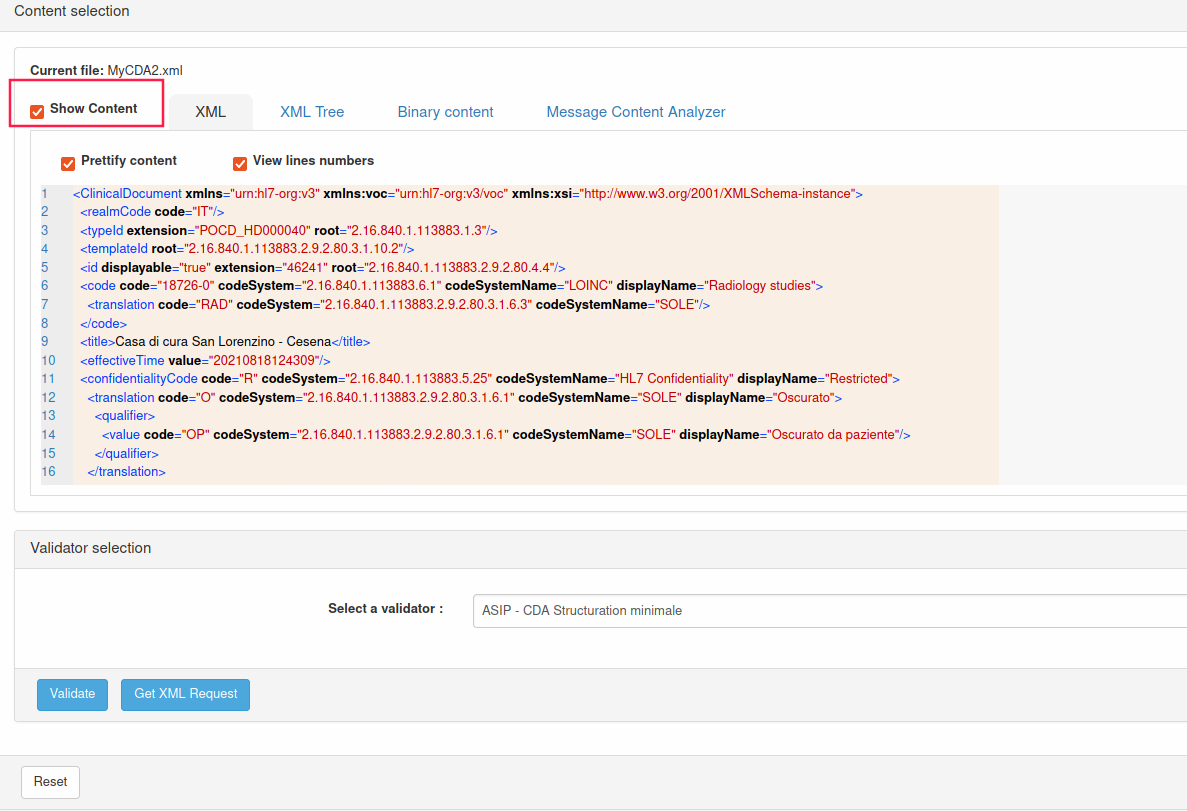
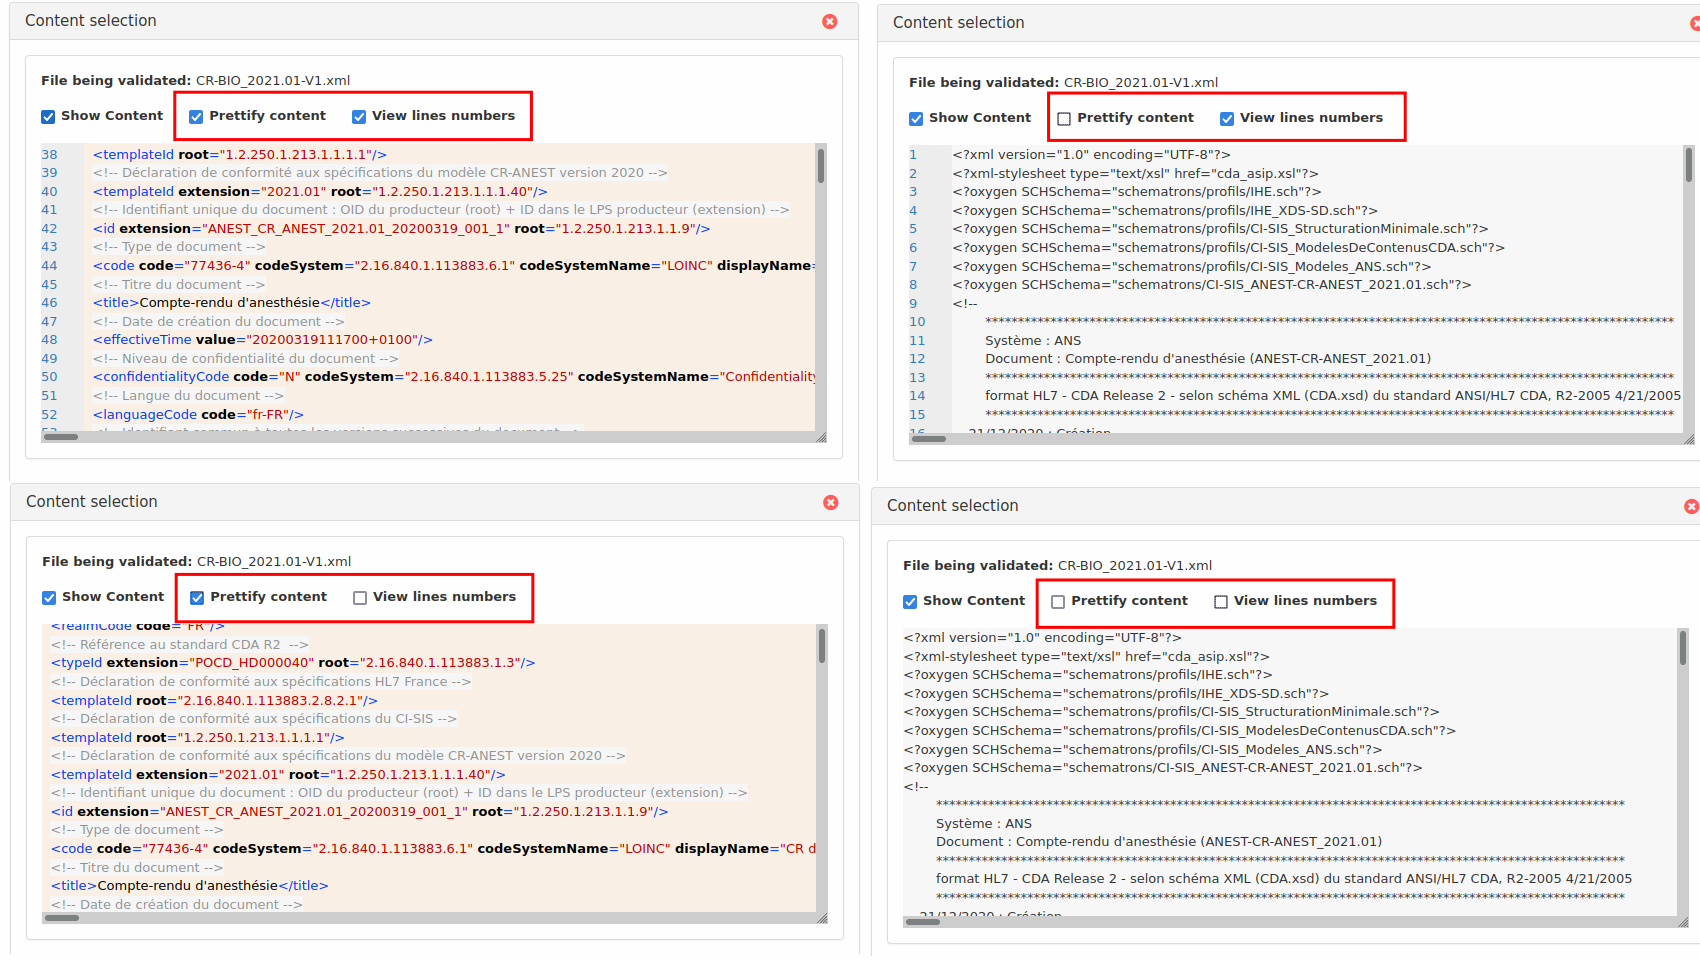
Message content can be prettified or not and lines numbers may be displayed.
-
Select the schematron and/or the ObjectsChecker validator to use in the drop-down list
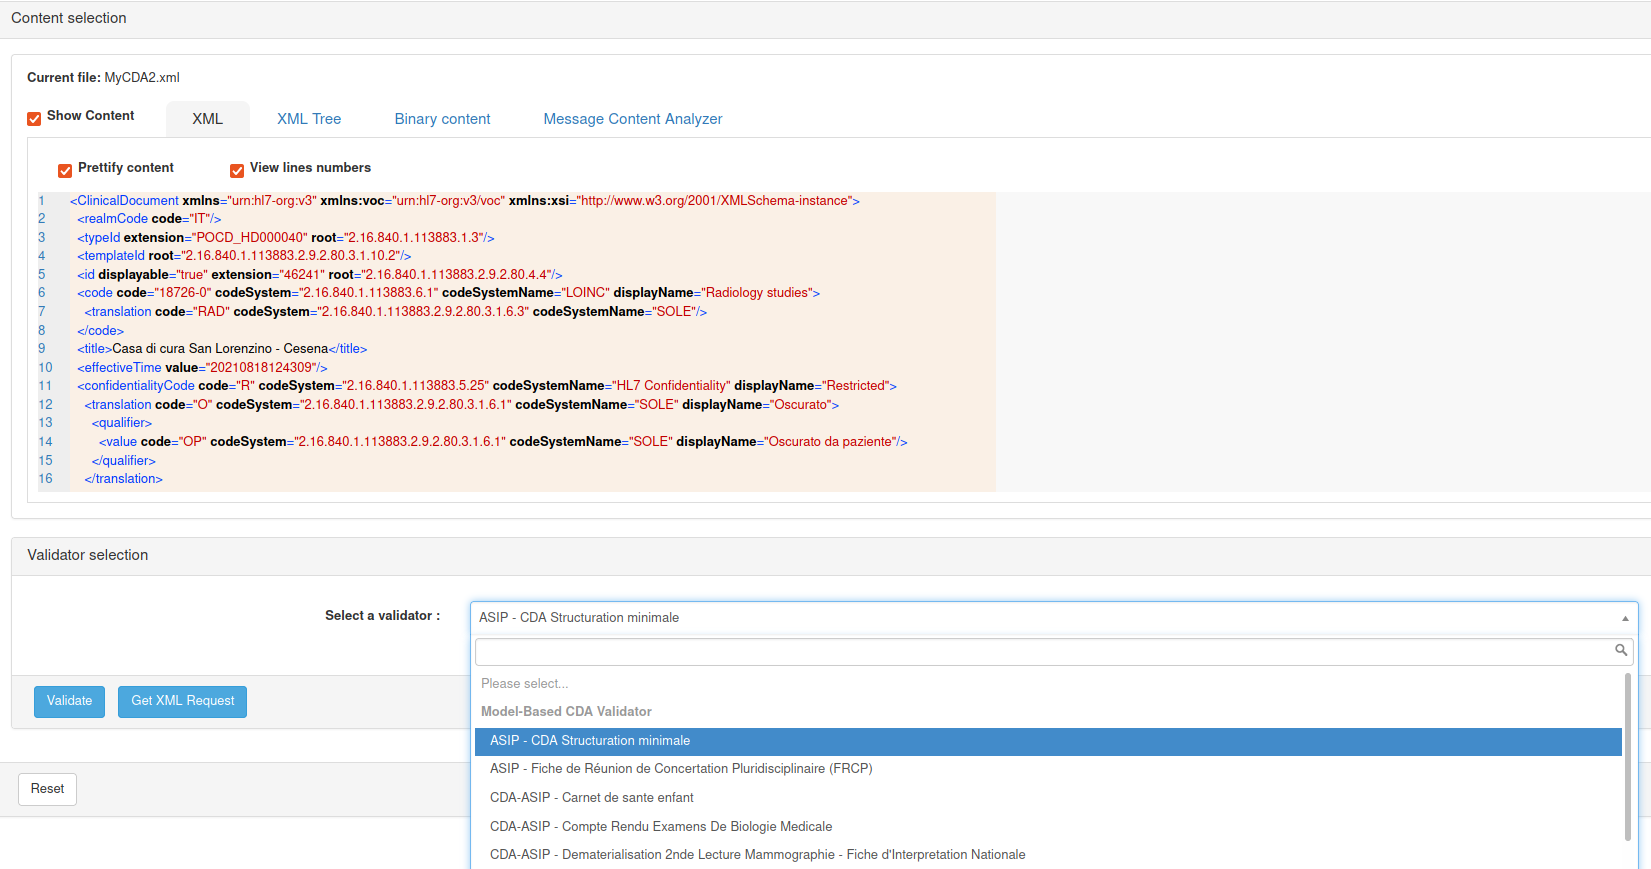
After selection, two buttons appears ; one to validate the uploaded message and one to help web service users to produce the body of the validation of the uploaded message using REST web service
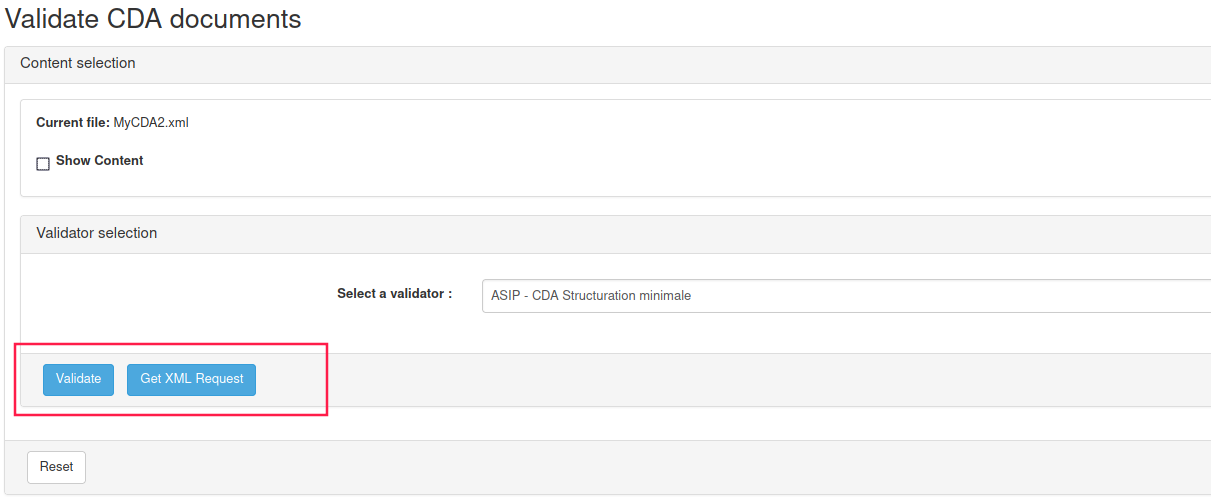
If you hit the “Generate body for Web Service API” button, a file will be downloaded which contains an API compliant body with uploaded message encoded in base64 format.
-
Finally, hit the “Validate” button. After a while, the validation result will be displayed below the selection area.
The validation result page is divided into different panels :
-
“Information” panel gives information about the validated file, the validation date, the validator used and the result of the validation. In this part, you will also find a permanent link to the current validation result. You can download validated message and XML validation result by clicking on
 near respectively “File Name” and
“Validation Results”
near respectively “File Name” and
“Validation Results”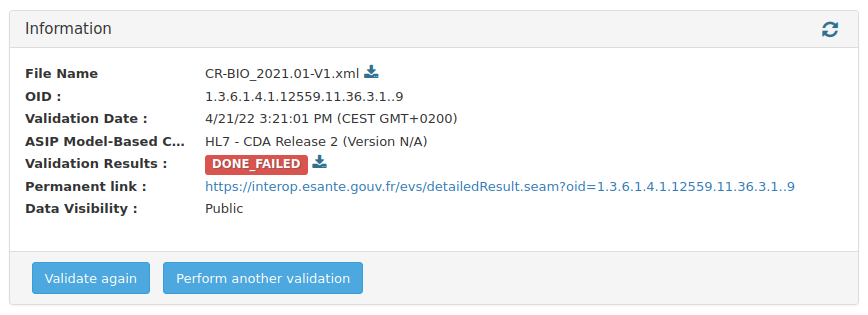
-
“Validation results” panel contains human-readable detailed validation report. It may be organized in many sections, depending on the validator.

-
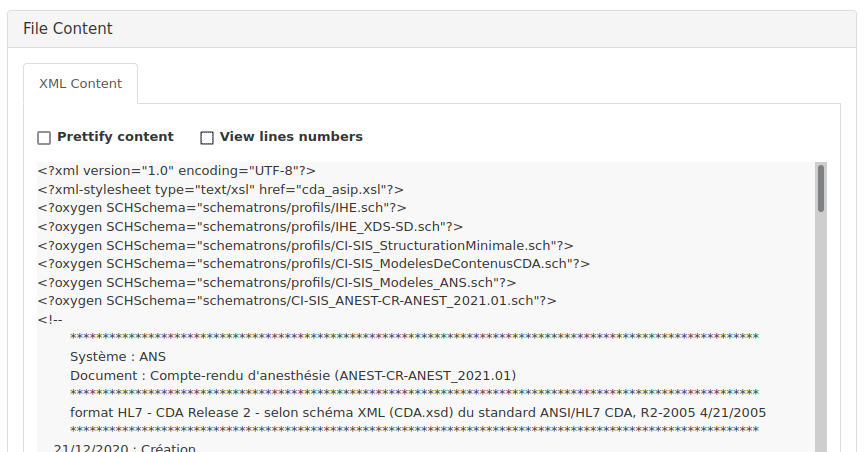
“File content” panel shows validated message content ; as for uploaded message preview, it’s possible to choose options to prettify message content.
Additional UI options
1. Tree view
The tree view is a way to display the file content in a tree structure. It is available for the both XML and JSON files.

2. XPath filter / JSON Path filter
In the tree view, you can construct your XPath or JSON Path query to display only the nodes you want to see.
 Reminder:
- XPath is in the form: /ClinicalDocument/component/structuredBody/component[1]/section[1]/entry
- JSON Path is in the form: $.ClinicalDocument.component.structuredBody.component[0].section[0].entry
Validation of HL7v2.x messages
Select the menu HL7v2 menu in the IHE drop-down menu

-
Upload or paste your message Enter your message in the box (paste your message, ER7 format) OR upload the file containing your message (be careful, the application allows only files with .hl7 or .txt extension).

-
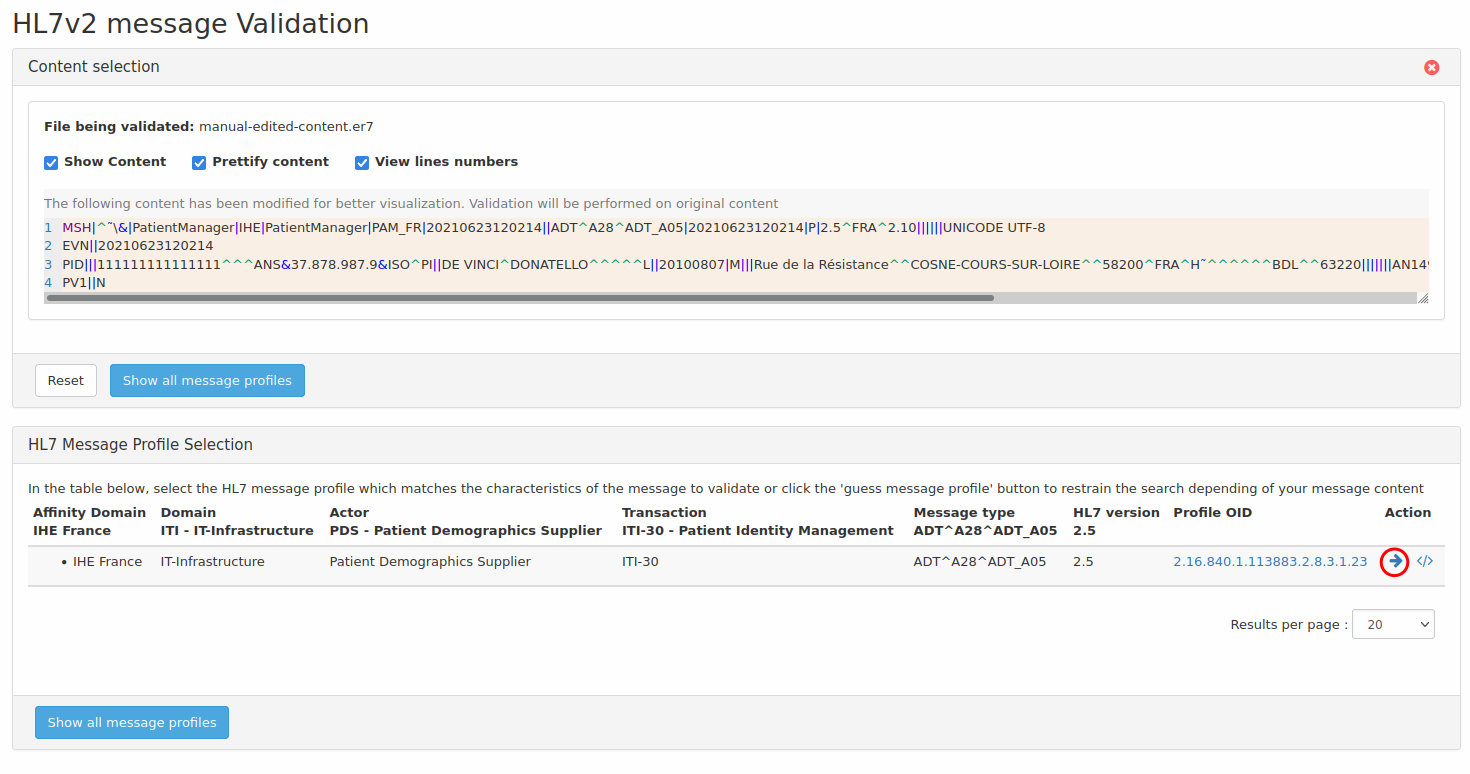
Choose profile Then, you must choose the HL7 message profile to use to validate your HL7 message.

The “Guess profile” button, just below the box, can be used to guess automatically the HL7 message profile to use, it extracts fields MSH-9 and MSH-12 and filter on those values.

To download a file which contains an API compliant body with validated message encoded in base64 format, hit </> symbol on the right side of the line corresponding to the message profile to use.

-
Launch validation process Finally, to launch the validation process, hit the arrow on the right side of the line corresponding to the message profile to use. This will launch the request for validation
Cross validation
The Gazelle X Validator module has been developed in order to be able to check the consistency of a document and/or a message in the context in which it has been produced. That means that we are not going to check the conformance of the message syntax and content against the specifications and underlying standards, conformance validation tools exist for this purpose. In the contrary, the Gazelle X Validator takes at least two files ( documents, messages) and checks that they respect a set of rules which have been clearly defined, using one file as a reference to check the correctness of the others.
For more details, refer to Gazelle X Validator Rule Editor user manual.
X Validations services are now activated as any other service, and a menu associated to the dedicated referenced standard must be added by administrator to let user access to the corresponding X Validator.
Select the menu HL7v2 menu in the IHE drop-down menu

-
Select the cross validator

-
Upload cross validated files

Depending on the chosen cross-validator, a list of attended entries for the cross-validation is shown. For each entry, upload the corresponding file that you want to cross-validate.
-
launch the validation process

Accessing the validation logs
For each of the validation services configured in the application, there is the possibility to access to the logs of validated files.

The page to access the logs present the various logs of validation performed by the users of the application.
- if a non identified user performs a validation, the log is visible by every one
- if an identified user performs a validation, the log is private to the user, but is also visible by the users with the roles monitor or ** admin**
- an identified user can change the visibility of one of his/her log public. In that case it will be visible by every one.
User with the admin role have now the ability to delete a specific log from this page.
Add-ons
The add-ons menu gives the user access to other tools that do not belong to any of the other menus. Among the add-ons
- DicomSCP Screener
- Message Content Analyzer
- Statistics
Dicom SCP Screener
The purpose of the DicomSCP screener is to query a DICOM SCP in order to identified the various SOP Class and Transfer Syntax that the SCP supports.
Message Content Analyzer
The message content analyzer is a tool that scans the content of message for known content.
If you don’t know the content of your file, or the validator you need to choose to validate your document you can use the Message Content Analyzer.
- Upload your file
- Click on analyze
- You should have the file description in result part (if you have any trouble, don’t hesitate to write a Jira)
You can click on each part of the tree or in the table to display the contain. You also can download each part.
You can click on the green arrow or validate part (I’m lucky validation can directly send you to the result valitation of your part) After you click on the refresh button, the validation permanent link is added to the table and the validation result is displayed in the tree.
Statistics

The statistic page displays statistics at a very high level. Statistics are computed per referenced standards. A validation outcome can be counted in several referenced standards when validated using web service API or attached to a referenced standard associated in different menu group.
If you want to consult more precise statistics, follow the link available for each kind of validation. For example, for CDA:

If statistics per country collection is activated in application preferences, it’s possible to show statistics by country on a world map by clicking on “See where users are from” hyperlink on left bottom of the main statistics page.

Logged as admin, it’s possible to download last month validation results by using the button “get previous month”. The export is a CSV file and concerns the chosen date range.

Rest services offered by the application
Accessing the version of the deployed application
The version of the application can be queried using a rest request in the form of
wget http://_host_/evs/rest/version
where _host_ is the hostname of EVS Client server.
The application responds with an xml content as follows
<version>6.0.0-RC4</version>
Accessing Validation results using rest
Access to the result of validation performed using the EVS Client application can be accessed using a REST request. The rest request is constructed as follow
wget http://_host_/EVSClient/rest/GetValidationStatus?oid=1.3.6.1.4.1.12559.11.1.2.1.4.283904
where the oid argument is the oid of the validation instance of interest.
The application returns one of the following values
- PASSED
- FAILED
- ABORTED